
Bathroom Tile Installers Wilmington NC
Expert ceramic, porcelain, and natural stone tile installation with professional waterproofing built for Wilmington's coastal climate. 20+ years of precision craftsmanship.
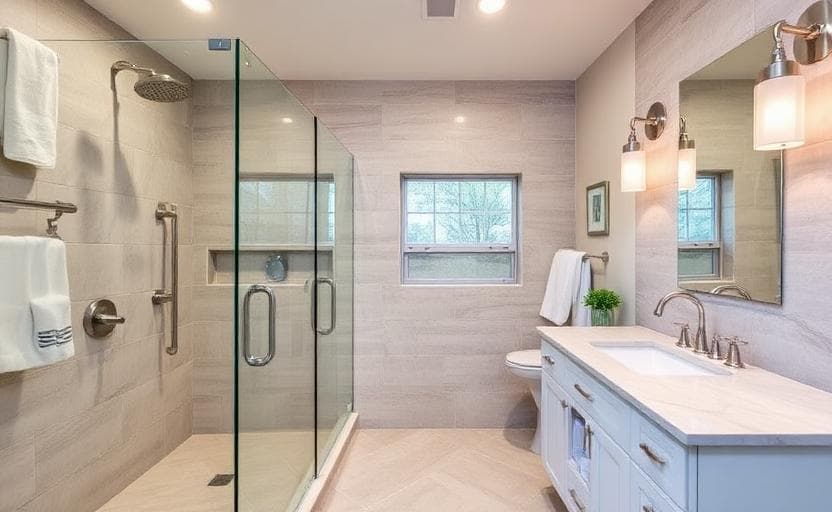
Bathroom tile is more than a design choice — it's a critical moisture barrier protecting your home's structure. At Swanson Construction, our tile installers specialize in precision subfloor preparation, professional-grade waterproofing membranes, and expert tile setting that stands up to Wilmington's salt air and humidity. From shower surrounds to heated floors, we deliver tile work that looks stunning and lasts for decades.
What We Do
Shower Tile Installation
Custom shower surrounds with proper waterproofing membranes and precision tile setting.
Bathroom Floor Tile
Ceramic, porcelain, and natural stone floors with level subfloor preparation.
Waterproofing Systems
Schluter-KERDI and topical membrane systems that protect against coastal humidity.
Natural Stone & Marble
Marble, travertine, and slate installation with proper sealing for coastal environments.
Grout & Sealing
Epoxy and cement grout options with professional sealing for long-term protection.
Tile Repair & Re-Tiling
Fix cracked tiles, failing grout, and leaky shower pans with proper structural repair.
Our Process
Like what you see?
Let's discuss your project — no pressure, no obligation.
Options for Every Budget
Compare our tiers to find the right scope for your project.
| Tier Name | Price Range | Timeline | What's Included | Best For |
|---|---|---|---|---|
Cosmetic Update | $5,000 - $12,000 | 1-2 weeks |
| Quick refresh without major plumbing changes |
Standard Remodel Most Popular | $12,000 - $30,000 | 3-6 weeks |
| Most homeowners wanting a complete bathroom upgrade |
Full Custom | $30,000 - $50,000+ | 6-12 weeks |
| Spa-like luxury bathroom transformation |
Cosmetic Update
$5,000 - $12,000
Timeline: 1-2 weeks
What's Included
- New vanity & mirror
- Updated fixtures
- Fresh paint
- New lighting
- Re-caulking & grout refresh
Best For
Quick refresh without major plumbing changes
Standard Remodel
$12,000 - $30,000
Timeline: 3-6 weeks
What's Included
- New tile shower/tub
- Custom vanity
- New plumbing fixtures
- Updated flooring
- Improved ventilation
- New lighting design
Best For
Most homeowners wanting a complete bathroom upgrade
Full Custom
$30,000 - $50,000+
Timeline: 6-12 weeks
What's Included
- Walk-in shower with frameless glass
- Freestanding soaking tub
- Heated floors
- Custom tile work
- Double vanity with storage
- Premium fixtures & finishes
- Smart features
Best For
Spa-like luxury bathroom transformation
Frequently Asked Questions
Free Consultation
No obligation. Transparent pricing.
(910) 443-4113Get Free EstimateProudly serving Wilmington, Wrightsville Beach, Carolina Beach, Leland, Hampstead, Ogden, and all of the Cape Fear region. View all service areas
Related Services
Kitchen Remodeling
Transform your kitchen with custom cabinets, countertops, and modern layouts tailored to your lifestyle.
From $8K
Bathroom Renovation
Upgrade your bathroom with new fixtures, tile work, and spa-like features for everyday comfort.
From $5K
Deck Building
Create the perfect outdoor living space with a custom-built deck designed for your property.
From $5K
Home Renovation
Revitalize your entire home with comprehensive renovation services from foundation to finish.
From $15K
Ready to Get Started?
Free estimates with transparent pricing. No pressure, no obligation.